Gahow Wang
445e491123
Gahow Wang
445e491123
third_party/vllm/ now tracked in git for direct patch management.
Based on vLLM v0.18.1 release with one patch applied:

  vllm/v1/core/sched/scheduler.py:
    Replace fatal assert with graceful skip when KV transfer callback
    arrives for an already-aborted request during PD disaggregated serving.

Future vLLM modifications should be made directly in third_party/vllm/
and committed normally. The patches/ directory is kept as documentation
of what changed from upstream.

Co-Authored-By: Claude Opus 4.6 (1M context) <noreply@anthropic.com>
2.0 KiB
Dify
Dify is an open-source LLM app development platform. Its intuitive interface combines agentic AI workflow, RAG pipeline, agent capabilities, model management, observability features, and more, allowing you to quickly move from prototype to production.
It supports vLLM as a model provider to efficiently serve large language models.
This guide walks you through deploying Dify using a vLLM backend.
Prerequisites
Set up the vLLM environment:
pip install vllm
And install Docker and Docker Compose.
Deploy
-
Start the vLLM server with the supported chat completion model, e.g.
vllm serve Qwen/Qwen1.5-7B-Chat -
Start the Dify server with docker compose (details):
git clone https://github.com/langgenius/dify.git cd dify cd docker cp .env.example .env docker compose up -d -
Open the browser to access
http://localhost/install, config the basic login information and login. -
In the top-right user menu (under the profile icon), go to Settings, then click
Model Provider, and locate thevLLMprovider to install it. -
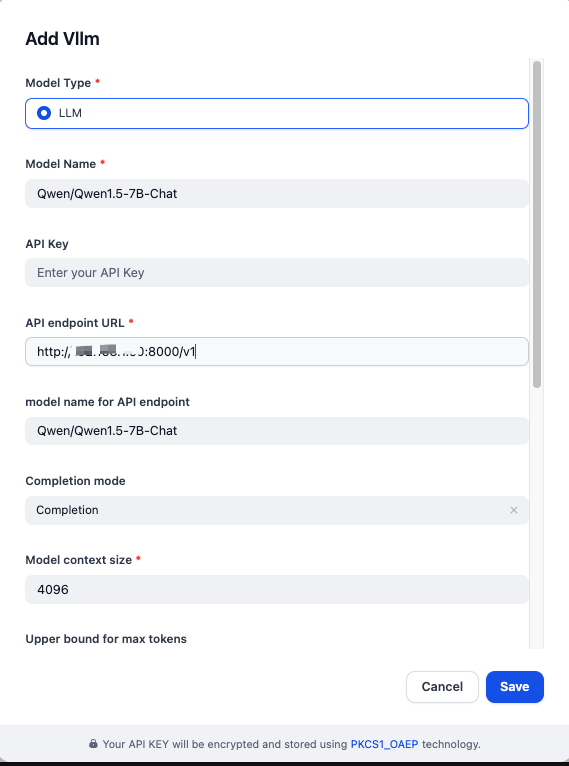
Fill in the model provider details as follows:
- Model Type:
LLM - Model Name:
Qwen/Qwen1.5-7B-Chat - API Endpoint URL:
http://{vllm_server_host}:{vllm_server_port}/v1 - Model Name for API Endpoint:
Qwen/Qwen1.5-7B-Chat - Completion Mode:
Completion
- Model Type:
-
To create a test chatbot, go to
Studio → Chatbot → Create from Blank, then select Chatbot as the type: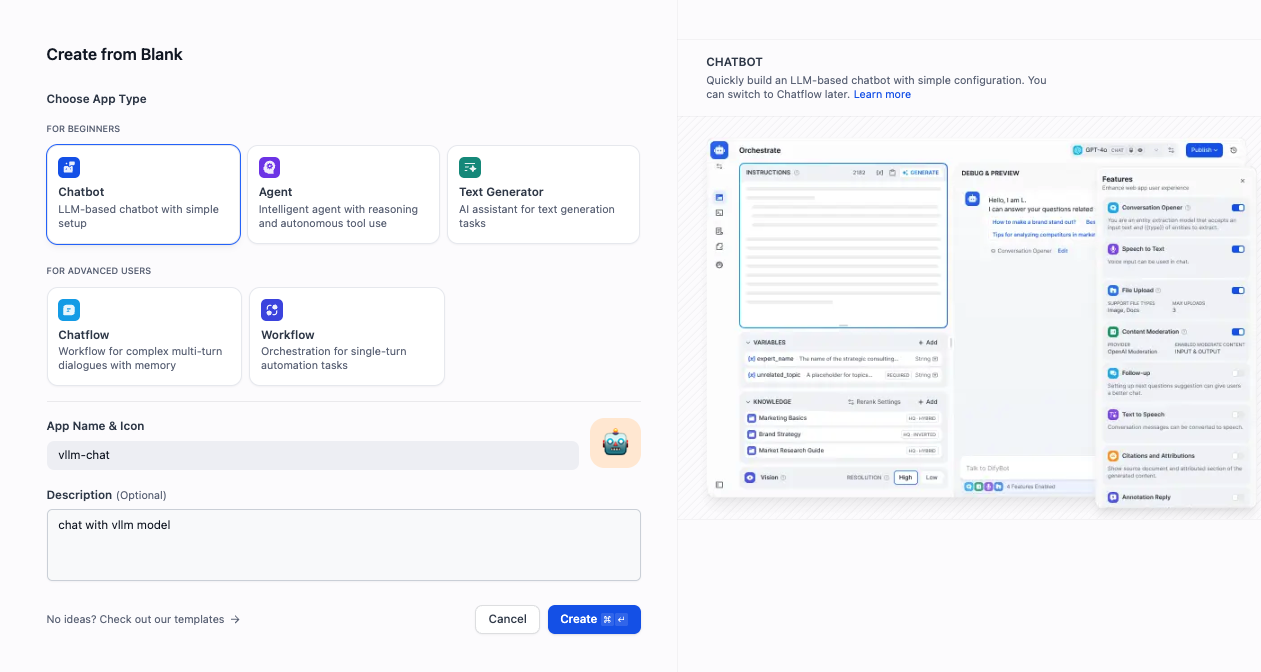
-
Click the chatbot you just created to open the chat interface and start interacting with the model: